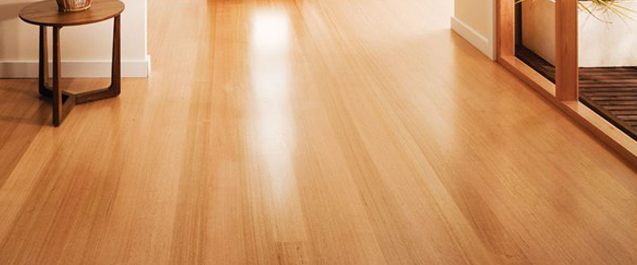
How to polish timber floors
Timber floors are an attractive feature that adds warmth to homes if maintained appropriately through regular polishing. This entails proper preparation and technique for optimal results.
Begin by sweeping or vacuuming to eliminate any dirt, dust, or pet hair that may have accumulated on your floor’s surface. Proceed with mopping using a commercial wood floor cleaner or creating a solution with dish soap and warm water to remove all remaining dirt present on the timber surface effectively.
Once clean, use an application method by wiping polish against the grain of wood first before wiping with it to ensure coverage is even across all areas thoroughly; let sit for several minutes before buffing off excess polish using a soft cloth gently. It’s worth noting that polishing should be done carefully every 2-4 months depending on traffic flow as too frequent polishing may cause damage over time.
Preparing the Floor
Before diving into polishing timber floors careful preparation must be taken into account for effective results. The first steps involve focusing on creating a completely clear canvas free of debris and dust which might affect later stages of progress.
To avoid hindrances while polishing it is essential to remove furniture that might obstruct easy movement marking the floor or posing unnecessary dangers. Preparing a smooth base for the polish involves sanding and buffing, which evens out any imperfections and bumps that could have an impact on how effectively the polish will be applied.
To ensure polished wooden floors with a sleek finish, thorough preparation of the surface cannot be overlooked.
Proper cleaning, decluttering and floor sanding/buffing to level out floor surfaces are all essential steps necessary for effective results.
Choosing the Right Polish
Getting just the right level of shine on timber floors can depend heavily upon selecting the correct polish type. Oil based finish, water based finish,and wax based polishes all have major differences between them meaning you need to take into account their respective pros & cons before deciding which one is best suited for you.
Oil based polishes offer superior defense against scratches and scuffs along with lasting glossiness but require regular maintenance including difficult application processes making it time intensive overall.
Water polish works best with softer wooden floor like pine or cedar providing natural looking finishes without any yellowing over time with easy application methods allowing for less maintenance requirements overall.
Wax polish delivers an impressive deep shine for all types of wood flooring while also protecting against wear & tear damage. While delivering on results its crucial to keep in mind this polish type requires more frequent reapplication compared to other options.
The key to picking out the perfect polish for your prized timber floor hinges on understanding both its inherent properties as well as what look appeals most strongly to you personally. In practice? Choose oil based formulations for hardwoods like oak or walnut while selecting water based options for softer varieties such as pine or cedar.
For an extra lustrous gleam thats sure to impress any guest try wax based polishes – though remember that these will need more frequent replenishment than other alternatives. To maximize your outcomes and ensure a professional finish every time be sure to carefully read and adhere to the manufacturers guidelines.
Applying the Polish
When trying to achieve a high gloss finish for your flooring, applying polish becomes an essential part of maintenance. The first step in achieving this lustrous look requires attention to detail in preparing your surface beforehand which means thorough cleaning and drying prior to starting any application process using suitable tools like a broom/vacuum cleaner followed by damp mopping using either water/detergent solution till completely dry again prior to commencement of polishing itself by using an effective tool like lambswool applicator/microfiber mop covering all the edges and corners in even overlapping circles to ensure complete uniformity throughout the area while being careful not to use too much polish and causing uneven areas or streaks after drying.
Protect your investment in hardwood flooring by taking care with the final step: polishing. To avoid ruining your efforts be sure not to walk on freshly polished floors or disturb any furniture placed on top until ample drying time has passed.
Remember: attention to detail pays dividends in longevity and long lasting beauty!
Drying and Curing
To achieve salon worthy nails that last longer than just a few days you need to know how vital it is to dry and cure polishes correctly during a manicure or pedicure. This process hardens the polish ensuring that it won’t easily chip or peel off after application. Before stepping onto floors or placing furniture after polishing you must let them dry and cure adequately.
The amount of time required for proper drying depends on what type of nail polish you are using; traditional nail paint takes approximately ten minutes of air drying while gel nail polishes require two minutes under UV light for curing.
Its advisable always to follow the manufacturers instructions during such processes since they’re designed uniquely for each product formula. A good way to ensure complete drying is by using either a Nail Drying Fan or Lamp as they blow air evenly over your nails or expose them gently under UV light – reducing smudging and preventing premature chipping of your nails.
Furthermore avoid excessive movements after painting to allow the polish to dry and cure completely before handling anything. Nobody likes looking down at their freshly painted nails only to realize they’re already chipping away! Thats why its worth spending a little extra time making sure they stay protected from smudges. To truly achieve that salon perfect finish give your manicure some much needed TLC during those critical first few hours after putting on polish.


